이전 글 참고!
AWS - Spring으로 AWS S3에 이미지 업로드하기1: S3 버킷과 IAM 생성
이번에 진행하는 프로젝트에서 AWS S3에 파일을 저장/수정/삭제할 수 있는 기능 구현을 담당하게 되었다. 버킷 생성부터 업로드 로직 구현까지의 과정을 정리해 본다. S3를 사용하는 이유 S3는 거
green-bin.tistory.com
Gradle Dependency
build.gradle
implementation 'org.springframework.cloud:spring-cloud-starter-aws:2.2.6.RELEASE'
어플리케이션 환경설정
application.yml
cloud:
  aws:
    s3:
      bucket: challenge66.file.bucket  # s3 버킷 이름
    region:
      static: ap-northeast-2  # region
      auto: false
    stack:
      auto: false
[cloud.aws.stack.auto](<http://cloud.aws.stack.auto>) 를 false로 지정하지 않으면 에러가 발생하기 때문에 false로 설정한다.
에러가 발생하는 이유는 Spring Cloud AWS를 실행할 때 Cloud Formation 스택에서 실행된다고 가정하는데 실제로는 실행되지 않기 때문이다.
credentials 정보(Access Key, Secret Access Key)는 더 안전하게 관리하기 위해 애플리케이션에 설정하지 않고 EC2 환경에 설정해두었다. 링크 참고
disableEc2Metadata 설정
SpringBootApplication 클래스
@SpringBootApplication
public class ServerApplication {

	static {
		System.setProperty("com.amazonaws.sdk.disableEc2Metadata", "true");  // 추가
	}

	public static void main(String[] args) {
		SpringApplication.run(ServerApplication.class, args);
	}
}
위의 설정을 해주지 않으면 아래와 같은 예외 메시지가 발생한다.
com.amazonaws.util.EC2MetadataUtils : Unable to retrieve the requested metadata (/latest/meta-data/instance-id). EC2 Instance Metadata Service is disabled
이미지 S3에 업로드/삭제 기능 구현
요구 사항은 다음과 같다.
- 이미지를 S3에 업로드 할 수 있습니다. 업로드한 이미지 URL을 반환합니다.
- 이미지를 S3에서 삭제할 수 있습니다.
- 확장자가 jpg, png인 이미지만 업로드할 수 있습니다.
FileUploadService
@Service
@Slf4j
@RequiredArgsConstructor
public class FileUploadService {

    private final AmazonS3ResourceStorage amazonS3ResourceStorage;

    // File은 업로드 처리를 하고 imageUrl을 반환
    public String save(MultipartFile multipartFile) {
        verfiedExenstion(multipartFile);
        String fullPath = MultipartUtil.createPath(multipartFile);
        return amazonS3ResourceStorage.store(fullPath, multipartFile);
    }

    public void delete(String fileUrl) throws SdkBaseException {
        amazonS3ResourceStorage.delete(fileUrl);
    }

		// 올바른 파일 확장자인지 검증
    public void verfiedExenstion(MultipartFile multipartFile) throws BusinessLogicException {
        String contentType = multipartFile.getContentType();

        // 확장자가 jpeg, png인 파일들만 받아서 처리
        if (ObjectUtils.isEmpty(contentType) | (!contentType.contains("image/jpeg") & !contentType.contains("image/png")))
            throw new BusinessLogicException(ExceptionCode.EXTENSION_IS_NOT_VAILD);
    }
}
FileUploadService는 이미지 업로드/삭제 요청을 처리하고 올바른 확장자인지 검증한다. 요청 받은 MultipartFile 객체를 File로 변환하여 업로드 한 후 S3에 업로드된 이미지 URL을 반환한다.
MultipartUtil
public final class MultipartUtil {
    private static final String BASE_DIR = "images";

    // 로컬에서의 사용자 홈 디렉토리 경로를 반환
    // OS X의 경우 파일 시스템 쓰기 권한 문제로 인해 필히 사용자 홈 디렉토리 또는 쓰기가 가능한 경로로 설정
    public static String getLocalHomeDirectory() {
        return System.getProperty("user.home");
    }

    // 파일 고유 ID 생성
    public static String createFileId() {
        return UUID.randomUUID().toString();
    }

    // 확장자만 잘라냄
    public static String getFormat(String contentType) {
        if (StringUtils.hasText(contentType)) {
            return contentType.substring(contentType.lastIndexOf('/') + 1);
        }
        return null;
    }

    // 파일 경로 생성
    public static String createPath(MultipartFile multipartFile) {
        final String fileId = MultipartUtil.createFileId();
        final String format = MultipartUtil.getFormat(multipartFile.getContentType());
        return String.format("%s/%s.%s", BASE_DIR, fileId, format);
    }
}
애플리케이션이 실행되는 환경에서 파일 시스템 쓰기 권한 문제가 발생할 수 있기 때문에 getLocalHomeDirectory() 메서드를 통해 사용자 홈 디렉토리 또는 쓰기 권한이 있는 경로로 설정해준다.
AmazonS3ResourceStorage
@Slf4j
@Component
@RequiredArgsConstructor
public class AmazonS3ResourceStorage {
    private final AmazonS3Client amazonS3Client;
    @Value("${cloud.aws.s3.bucket}")
    private String bucket;

    @Value("${cloud.aws.region.static}")
    private String region;

    public String store(String fullPath, MultipartFile multipartFile) {
        File file = new File(MultipartUtil.getLocalHomeDirectory(), fullPath);

        try {
            multipartFile.transferTo(file);     // MultipartFile을 File 객체의 형태로 변환
            amazonS3Client.putObject(new PutObjectRequest(bucket, fullPath, file)   // 파일을 복사하여 임시파일과 함께 로컬에 저장
                    .withCannedAcl(CannedAccessControlList.PublicRead));    // 접근 권한 public으로 설정
        } catch (Exception e) {
            log.error(e.getMessage());
            throw new BusinessLogicException(ExceptionCode.FAILED_TO_UPLOAD_FILE);
        } finally {
            if (file.exists()) removeNewFile(file);   // 로컬에 있는 파일 삭제
        }
        return amazonS3Client.getUrl(bucket, fullPath).toString();  // S3에 업로드된 이미지 URL 반환
    }

    private void removeNewFile(File targetFile) {
        if (targetFile.delete()) log.info("The file has been deleted.");
        else {
            log.info("Failed to delete file.");
        }
    }

    public void delete(String fileUrl) {
        try {
            String key = fileUrl.substring(64);
            try {
                amazonS3Client.deleteObject(new DeleteObjectRequest(bucket, key));
            } catch (AmazonServiceException e) {
                log.error(e.getErrorMessage());
                exit(1);
            }
            log.info(String.format("[%s] deletion complete", key));
        } catch (Exception e) {
            throw new BusinessLogicException(ExceptionCode.FAILED_TO_DELETE_FILE);
        }
    }
}
이미지를 S3에 업로드/삭제하는 기능을 담당한다. 여기서 MultipartFile을 File 객체 형태로 변환해주어야 하는데, 이 과정에서 파일이 복사되어 로컬에 저장되기 때문에 로컬에 있는 이미지를 삭제해주어야 한다.
이미지를 업로드 할 때 CannedAccessControlList.PublicRead 으로 설정하여 접근 권한을 public으로 설정해준다.
Controller
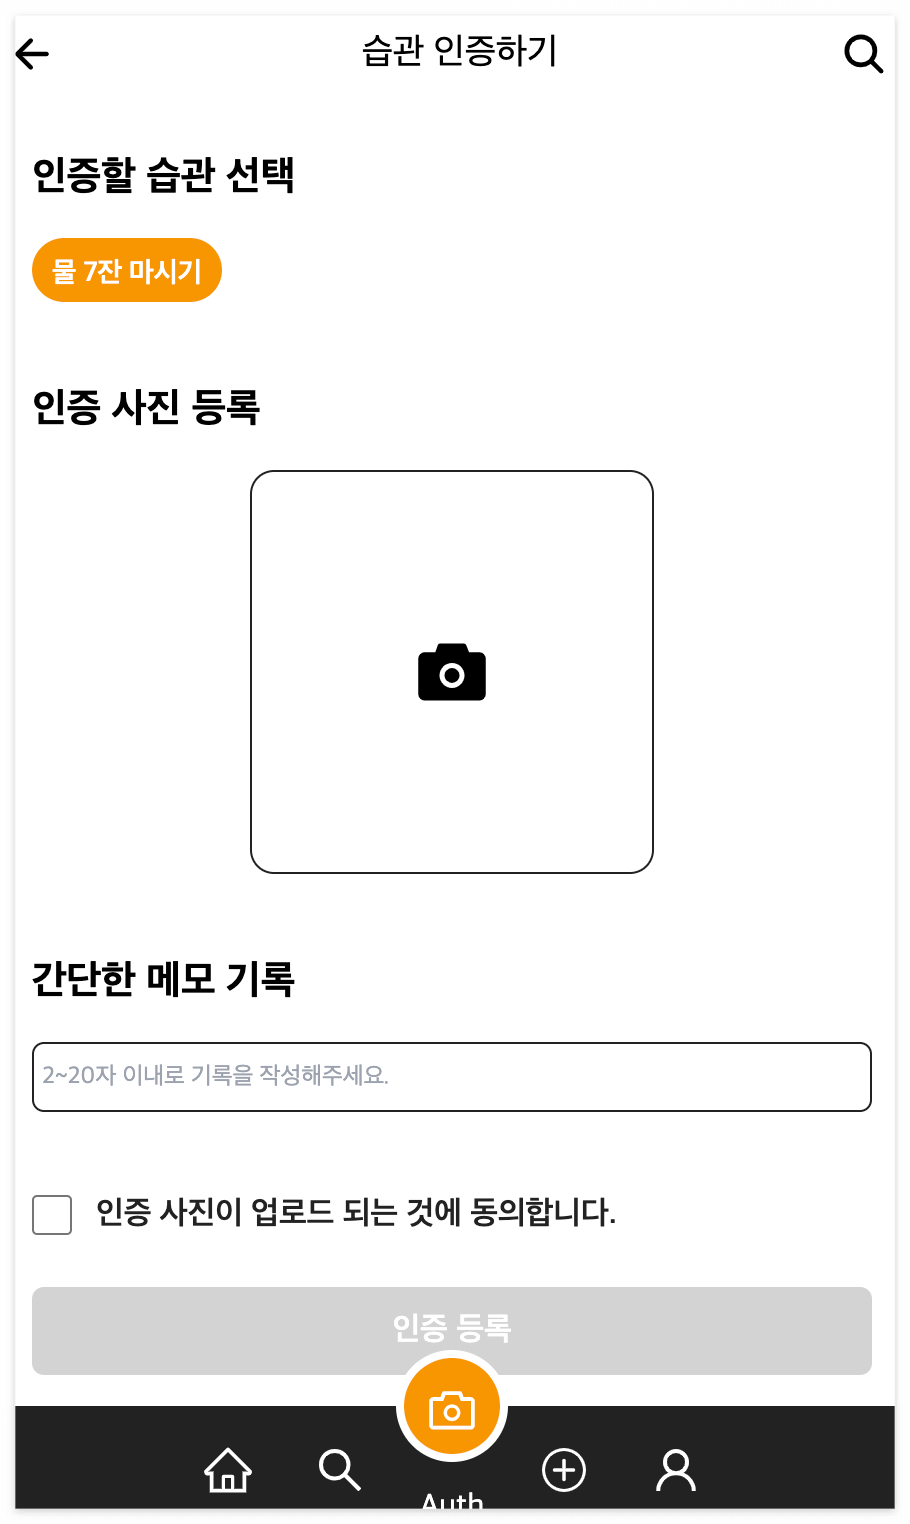
챌린지 참여 인증 사진을 업로드하는 기능을 구현했다.
예를 들어 이불 개기 챌린지에 참여중이라면 챌린지에 참여 후 직접 갠 이불 사진을 인증 사진으로 업로드 하는 것이다. S3에 성공적으로 업로드된 이미지는 URL로 반환된다.
@RestController
@RequestMapping("/challenges")
@RequiredArgsConstructor
public class ChallengeController {
		private final FileUploadService fileUploadService;
		...
    @PostMapping("/{chaellenge-id}/auths")
    public ResponseEntity createAuth(@PathVariable("chaellenge-id") @Positive Long challengeId,
                                     @RequestPart("file") MultipartFile multipartFile,
                                     @RequestPart("data") @Valid AuthDto.Post postDto) {
        challengeService.todayAuthCheck(challengeId);
        Auth auth = authMapper.toEntity(postDto);
        String authImageUrl = fileUploadService.save(multipartFile);
        auth.changeImageUrl(authImageUrl);

        return new ResponseEntity<>(authService.createAuth(auth, challengeId), HttpStatus.CREATED);
    }
}
결과
66Challenge에서 물 마시기 챌린지의 인증 사진 등록을 통해 이미지가 잘 조회되는 것을 알 수 있다.


S3에서도 이미지가 잘 저장되어 있는 것을 확인할 수 있다.


추가
지금 구현한 상태로는 고용량의 이미지가 그대로 S3에 저장되게 된다. Thumbnail 이미지를 생성해서 웹 성능을 향상시켜보자
Spring - Thmbnail 이미지로 웹 성능 향상시키기
얼마 전 S3로 이미지를 저장하고 저장된 이미지의 URL을 반환하는 기능을 구현했다. 하지만 한 가지 문제가 있었는데, 고용량의 이미지가 그대로 올라간 것이다. Thumbnail 이미지를 생성하는 이유
green-bin.tistory.com
'Spring' 카테고리의 다른 글
| Spring - Thmbnail 이미지로 웹 성능 향상시키기 (0) | 2023.03.15 |
|---|---|
| Spring - Jasypt를 사용해서 application.yml 프로퍼티 암호화하기 (0) | 2023.03.09 |
| Spring Security - OAuth2와 JWT로 로그인 구현하기(Kakao, Google, Naver) (6) | 2023.03.05 |
| Spring - Scheduler로 매일 자정 실행되는 로직을 짜보자 (0) | 2023.03.02 |
| Spring - No Offset 페이지네이션으로 페이징 성능을 개선해보자! (0) | 2023.02.28 |